
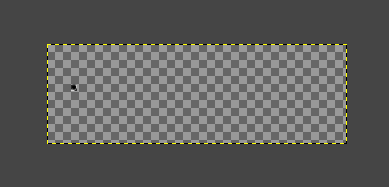
GIMP is the Linux equivalent of Photoshop. GIMP is short for GNU Image Manipulation Program. Photoshop is a great program, but GIMP is free. Photoshop costs $240 per year. I can buy a 4 GB RAM laptop for $240. (Requires minimum 14 inch on diagonal display.) Put a Linux Lubuntu operating system on it for free, and load GIMP on it for free. I use GIMP for editing pictures that go on the internet. You can get free images from unsplash.com.
6.1 Go to File > New to open a new image.
6.2 Select the Paintbrush Tool. In the tool dialog box select Tool Options and adjust the size of the line.
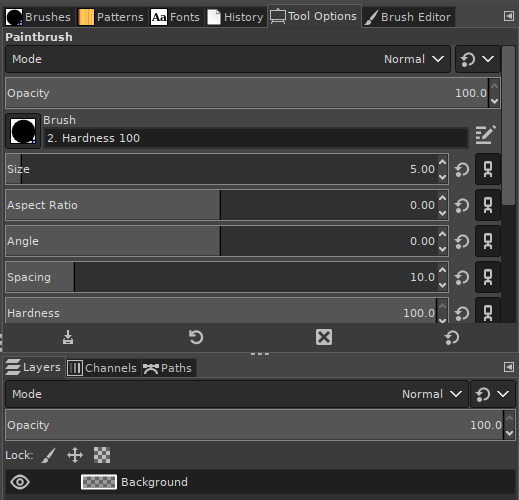
6.3 Make the foreground color black.
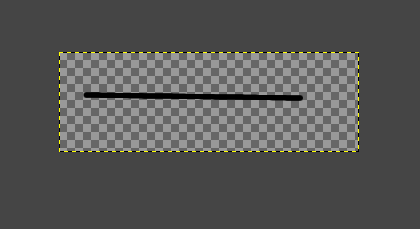
6.4 Click with Paintbrush Tool where you want the line to start. Move the cursor to where you want the line to end. Press the Shift key and click with your mouse. The line will appear.
6.5 If you want to change the line. Erase it by backing up using Edit > Undo.
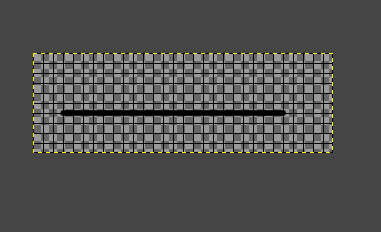
6.6 If you want to create a perfectly horizontal or vertical line, use grids. Go to View and select Show Grid. Go to View and select Snap to Grid.
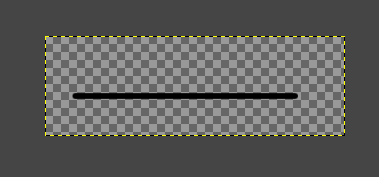
6.7 Click with Paintbrush Tool where you want the line to start. Move the cursor to where you want the line to end. Press the Shift key and click with your mouse. The line will appear and snap to a horizontal grid.
6.8 Go to View and deselect Show Grid. Go to View and deselect Snap to Grid.
Ch1-Resize
Ch2-Crop
Ch3-Sliding
Ch4-Slice
Ch5-Border
Ch6-Line
Ch7-All Together
