
SSH allows secure remote access to the Raspberry Pi command line. The following installation requires opening a port in you router for port forwarding to the Raspberry Pi. Even though SSH is considered a safe application, it can be exploited. Your Internet Service Provider (ISP) may not like it. They log hack attempts on your router/modem.
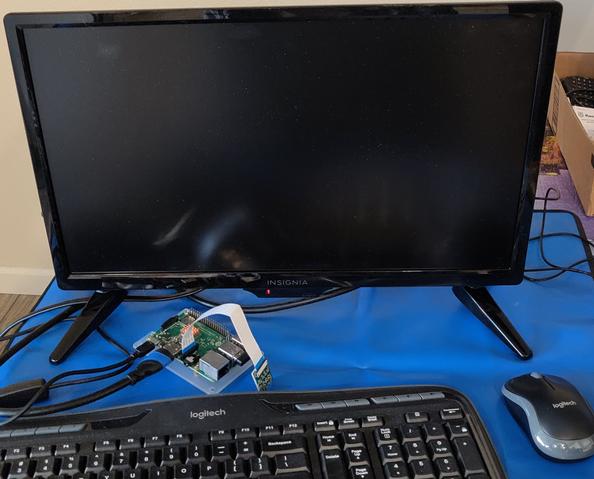
1.1 This setup was performed on Raspberry Pi 3 Model B+, with a monitor, keyboard, and mouse. The router is a Cox Panoramic router/modem. The software version was Raspbian Version 9 (NOOB). A 16GB card was used. Be sure to plug in your monitor before plugging in the HDMI cable into your Raspberry Pi board. I used a wireless keyboard and mouse combination. Turn on Pi. We will setup SSH on Pi. We need DDNS for remote access of the Pi. We will setup DDNS from https://www.duckdns.org . The setup instructions differ some from those on www.duckdns.org Finally, we will setup port forwarding on our router.
1.2.1 We must change the Pi password from the default. By default the username is pi and the password is raspberry. Use a strong password or passphrase. Type in passwd into the command line. You will be prompted for the current password (raspberry). Enter it. You will then be prompted twice for a new password. It will end with the message (passwd: password updated successfully).
1.2.2 Open the command line on Raspberry Pi. Find your software version.
cat /etc/os-release
1.2.3 Try opening SSH on the local computer. You probably get a message saying Port 22 is not open.
ssh pi@raspberrypi
Output
It will be similar to) Port 22 not open.>
1.2.4 Type Exit to close SSH.
1.2.5 We must start the SSH service. Type in the following.
sudo raspi-config
1.2.6 Use keyboard to navigate to Interfacing Options. Select SSH. You will be prompted with “Would you like the SSH server to be enabled?” Select Yes. Use tab key to select Finish.
1.2.7 Install curl and reboot your Pi.
sudo apt-get update


        sudo apt-get install curl


        sudo reboot now
1.3.1 We need DDNS to access the Raspberry Pi hostname from outside your network. DDNS takes the place of a fixed IP address. Sign up for a free DDNS domain name and authentication token at www.duckdns.org . It is simple and free to sign up. I used my google email account to sign up. You will be provided an authentication token, and you will select a domain name. You need your sign in password to access the authentication token. You can access either the sign in page or install directions page separately, but not both at the same time on the www.duckdns.org website. But, to simplify things, the instructions are given below.
1.3.2 On your Pi, change to your home directory, create a duckdns directory, change to the duckdns directory, and open a file with Nano text editor called duck.sh.
 cd  ~


          mkdir  duckdns


          cd   duckdns


          nano  duck.sh
1.3.3 Copy and paste the following into duck.sh file .
echo url="https://www.duckdns.org/update?domains=exampledomain&token=a7c4d0ad-114e-40ef-ba1d-d217904a50f2&ip=" | curl -k -o ~/duckdns/duck.log -K -
1.3.4 In the Nano editor, use the cursor and backspace keys to delete the exampledomain and the token in duck.sh . Replace them with youdomain.duckdns.org domain and the token from www.duckdns.org . You can copy and paste the token. Press Ctrl + x, press y, and press Enter. Your changes to duck.sh are now saved and the file closed.
1.3.5 Make the duck.sh file executable.
chmod 700 duck.sh
1.3.6 Next we will be using the cron process to make the script run every 5 minutes. Enter the following command and select the Nano editor to open crontab.
crontab -e
1.3.7 Move the cursor to the bottom of crontab, and copy and paste the following.
*/5 * * * * ~/duckdns/duck.sh >/dev/null 2>&1


          Press Ctrl + x, press y, and press Enter.
1.3.8 Test the script by running duck.sh. The output should return you to the prompt.
./duck.sh
1.3.9 We will check to see if the script was successful. If it is Ok it will say Ok. If there is a problem it will say KO. If it says KO then double check your Token and Domain in the duck.sh script.
1.3.10 Restart your Pi
sudo reboot now
1.4.1 If your remote computer is Windows, download PuTTY which is a free client for SSH. Type in your Host (DDNS domain) name, select SSH, and click Open. You should get a connection screen for your Pi username and password. However, it probably will not work, because your router is blocking the SSH port.
If the Windows and Pi computers are on the same network, perform the following PuTTY test with the local IP address for the Pi. You can get the local IP address for the Pi computer by typing hostname -I into the command line of the Pi computer. Then go to the client computer. Using PuTTY type in the Host IP address (the local IP for Pi). You should get a connection. If not, continue to open port forwarding on your router.
1.4.2 You must activate port forwarding on your router. I am using a standard Cox Panoramic Router/Modem. Log into your router. Locate Port Forwarding. Then select the Pi computer on my network. Under port, type 22. Select protocol TCP. (Actually it took a little effort to find Port Forwarding.) I used the following steps on my Cox Panoramic Router/Modem.
Log in to router.
Advanced Settings
Port Forwarding (There is a link to the Cox website.)
Connect tab
See Network
Advanced Settings
Port Forwarding
Add Port Forward
Select the raspberrypi computer
Select Protocol (UDP/TCP)
Type in the Port Number (22)
1.4.3 Test the SSH connection again using PuTTY and the DDNS domain name. It should work.
1.4.4 If using a Linux computer to access the Raspberry Pi you do not need PuTTY. Just type the domain name or IP address into the command line as follows.
ssh domain name (or IP address)
Table of Contents
Ch1-SSH
Ch2-VNC
Ch3-Motion Camera
Ch4-Remote Viewing
