
In this series of tutorials we will download, and install Anaconda and Jupyter. We will configure Anaconda-Navigator for deep learning. This includes installation of Python3, TensorFlow, and Keras. We will test the installation with the Hello World of deep learning, the pima-indians-diabetes database. We will then use the model to predict results.
We assume you have completed Part I, Part II, and Part III on Anaconda installation. In this tutorial we will continue with the pima-indians-diabetes program. Jupyter is where you write the program. Anaconda-Navigator button will be present in your desktop. Navigator is configured for Deep Learning with Python3, Tensor-Flow, and Keras. We will start the tutorial by downloading the pima-indians-diabetes.csv database. We will use the downloaded database in the program to train the model. The program from Part III will be modified to predict results for a new patient. In the next section we will create a dataset from patient information. In other words, given data for a patient; we will predict if they will get diabetes.
1.1 This program is the Hello World program for testing deep learning programs. The pima-indians-diabetes database is used to predict whether or not a person will develop diabetes. The database consists of about a thousand lines. Each line contains eight values for traits related to diabetes for a person. The nineth value is 0 or 1 for diabetes. We will explain in more detail in the Program Details.
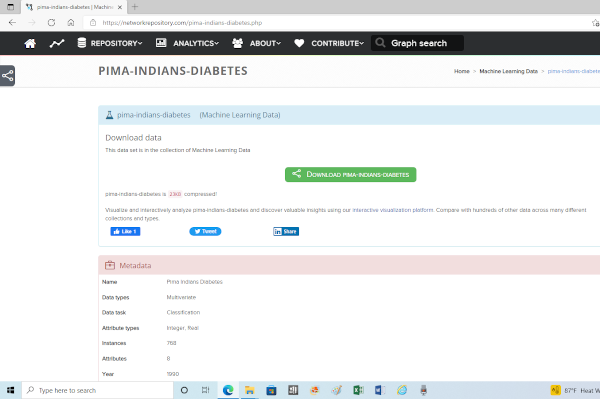
1.2 Download the pima-indians-diabetes.csv dataset to your computer from https://networkrepository.com/pima-indians-diabetes.php . Just click the green download button to save to Downloads on your computer.
2.1 Create input data for a new patient using the LibreOffice Calc spreadsheet. We will be given the following data:
2.2 The labels for each column of the dataset are listed below.
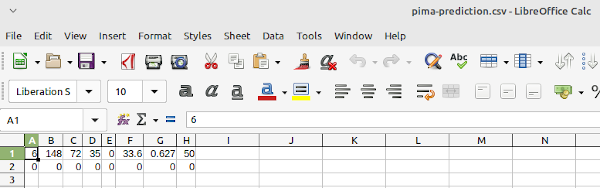
1. Number of times pregnant (Column 0)2.4 Screenshot of LibreOffice Calc database for our patient. Open Calc and enter the values above.
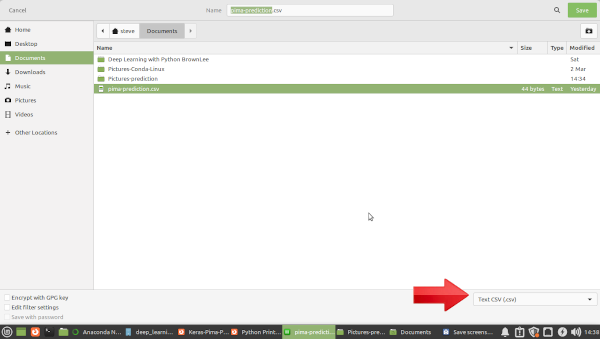
2.5 Screenshot of Save As pima-prediction.csv page. Make sure you save as a .csv file.
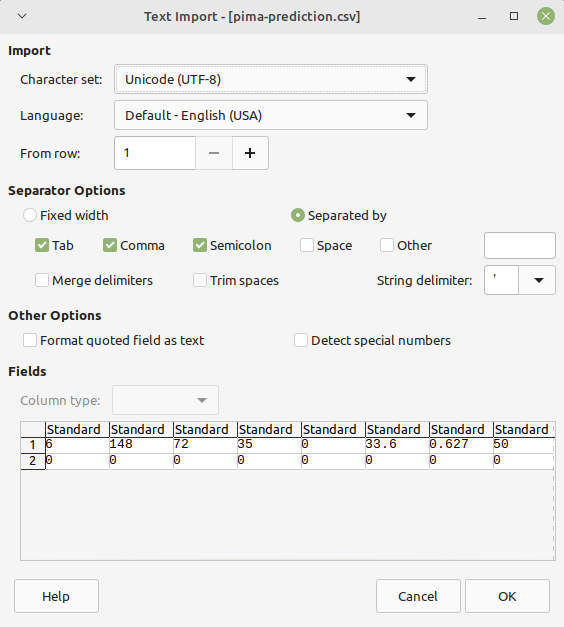
2.6 Screenshot of Dialog Box that opens when reopening the pima-prediction.csv file. There is nothing to do here. Just for your information.
3.1 Open the Anaconda-Navigator Home page with the desktop launcher.
3.2 Select Environments. Select env1.
3.3 Select Home. Launch Jupyter Notebook.
3.4 We can open Jupyter Notebook any time from Navigator by going to Environments->env1->Open with Jupyter Notebook.
3.5 Jupyter Notebook will open. (Remember that this is Jupyter Notebook with env1, that includes Python3, TensorFlow, and Keras.) Jupyter consists of two pages. A Home page, where we are now; and a code page.
3.6 From the Home page navigate to New->Notebook->Python3.
3.7 The Jupyter code page will open, with an open line to place code.
3.8 We will test Jupyter to see if everything is working properly. Type import Keras, and click on Run. If everything is working properly, you will see a blank line. If error codes appear, we have a problem. We can now continue with pima-indians-diabetes test program.
import Keras
4.1 At the beginning of the tutorial we downloaded the pima-indians-diabetes.csv database. Essentially the program determines the probability that a person will get diabetes given a set of initial conditions. For a more detailed analysis https://thesurfdragon.com/AI/details-of-program-for-your-first-artificial-intelligence-program/index.html.
Note: I strongly suggest getting the PDF copy of Deep Learning With Python Develop Deep Learning Models on Theano and TensorFlow Using Keras by Jason Brownlee. It is thorough and easy to understand.
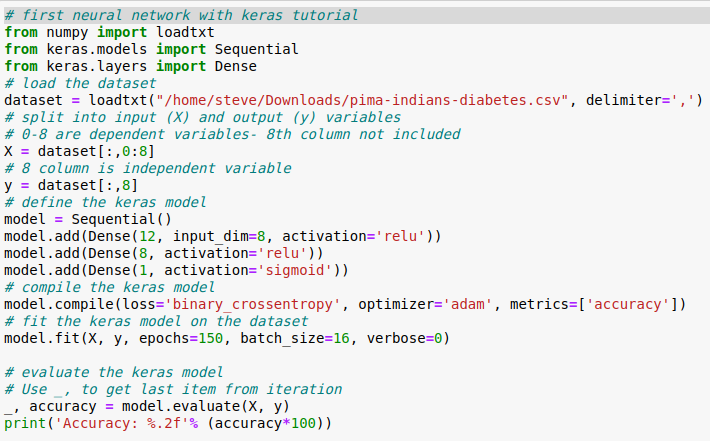
4.2 The completed program is below. We will examine each part of the program later.
# first neural network with keras tutorial
from numpy import loadtxt
from keras.models import Sequential
from keras.layers import Dense
# load the dataset
dataset = loadtxt("/home/steve/Downloads/pima-indians-diabetes.csv", delimiter=',')
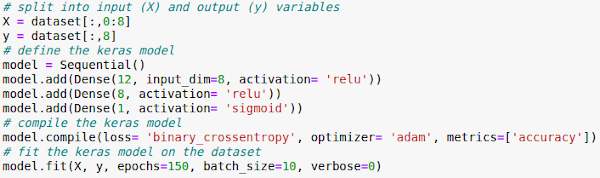
# split into input (X) and output (y) variables
# 0-8 are dependent variables- 8th column not included
X = dataset[:,0:8]
# 8 column is independent variable
y = dataset[:,8]
# define the keras model
model = Sequential()
model.add(Dense(12, input_dim=8, activation='relu'))
model.add(Dense(8, activation='relu'))
model.add(Dense(1, activation='sigmoid'))
# compile the keras model
model.compile(loss='binary_crossentropy', optimizer='adam', metrics=['accuracy'])
# fit the keras model on the dataset
model.fit(X, y, epochs=150, batch_size=16, verbose=0)
# evaluate the keras model
# Use _, to get last item from iteration
_, accuracy = model.evaluate(X, y)
print('Accuracy: %.2f'% (accuracy*100))
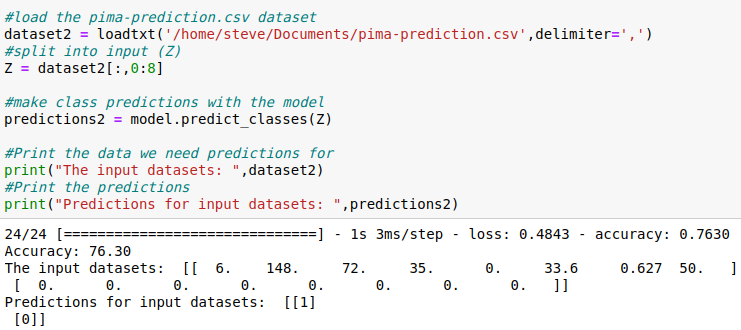
#load the pima-prediction.csv dataset
dataset2 = loadtxt('/home/steve/Documents/pima-prediction.csv',delimiter=',')
#split into input (Z)
Z = dataset2[:,0:8]
#make class predictions with the model
predictions2 = model.predict_classes(Z)
#Print the data we need predictions for
print("The input datasets: ",dataset2)
#Print the predictions
print("Predictions for input datasets: ",predictions2)
4.3 After pasting the code from here to Jupyter Notebook, you must check the dataset paths. The program lines should now be similar to the following.(Instead of steve you will see your user name and your path.)
dataset = loadtxt('/home/steve/Downloads/pima-indians-diabetes.csv', delimiter=',')
dataset = loadtxt('/home/steve/Documents/pima-prediction.csv', delimiter=',')
Make path changes to the code. Path to pima-indians-diabetes.csv, and path to pima-prediction.csv


4.4 We will now run the code. After about 60 seconds a final statement of accuracy will be printed. The input lines of your database will be printed, and a 0 or 1 for diabetes will be printed. Your machine learning learning program worked. For the input data the model predicts a 1 for diabetes. If the program has errors, check your code carefully, especially the paths. Google any error messages.

4.5 Save the work in the Notebook by clicking on the floppy disk icon in upper left of the toolbar. The Notebook file is also auto saved. Go to File > Close and Halt. You will return to the Home page. You can see the notebook name in a list of files and directories in the Home page. You can reopen a notebook by clicking on the file name.
4.6 You can change the name of the Notebook project at the top of the page by clicking on Untitled 0 and renaming the Notebook project.
4.7 The files are stored on your harddrive. The following is the location of my files, where your jupyter files end in .ipynb. /home/Untitled1.ipynb
5.1 The complete program with output is listed in the screenshots below. The program is a screenshot of that listed above.
5.2 To start we import the necessary modules and load the dataset.
5.3 Second we split the dataset and created a model.
5.4 Evaluate the accuracy of the model.

5.5 Load the prediction dataset and create a two dimensional array.
5.6 Predict results for input dataset. In other words, determine from the input data if the patient is likely to have diabetes.

5.7 Print the input data. Print the prediction for the patient.

5.8 Printed output. Accuracy for the model. Input characteristics for patient, and determination of predisposition for diabetes.
SALARSEN.COM
Python Tutorial
Anaconda Linux Install I
Navigator Install II
Jupyter Install III
Program Details
