


In this series of tutorials we will download, and install Anaconda, Navigator, and Jupyter. We will configure Anaconda-Navigator for deep learning. This includes installation of Python3, TensorFlow, and Keras. We will test the installation with the Hello World of deep learning, the pima-indians-diabetes database.
For those of you who don't know, I will describe the components of Anaconda in more detail. Anaconda is the name of the overall program that stores programming packages for your use. Navigator is a graphical user interface for installation of packages. (Such as Python, TensorFlow, and Keras.) A group of packages is called an environment. Finally we will install Jupyter Notebook to run the code in the environment we created.
1. You can run simple machine learning programs on a traditional single processor with 16 GB RAM, for around $800. I upgraded my traditional computer from 8GB to 16GB RAM. You can do much better on a desktop or laptop with a NVIDIA GPU and 16 GB RAM for around $1,600. Search internet for best laptops for Machine Learning. These also happen to be the best gaming laptops.
2. It is possible to run your programs for free on the Google Deep Learning platform Colaboratory. it is an internet based GPU running Python3, TensorFlow, and Keras. Here is link to the tutorial. Colaboratory
We are going to configure Navigator for a deep learning environment with Python3, TensorFlow, and Keras. You can create many different environments in Navigator. Create the environment that applies to your programming situation. This is the power of package management in Anaconda. It is why Anaconda was created.
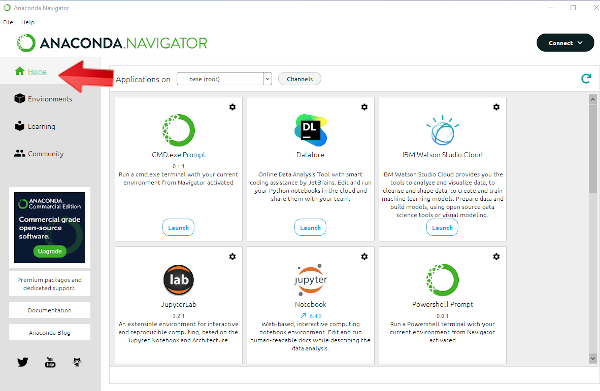
19. Double click on the Anaconda-Navigator launch button on your desktop. (Select Launch Anyway if necessary.)
20.Anaconda-Navigator home page.
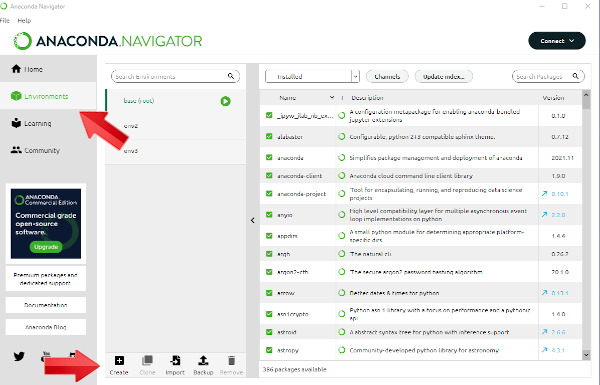
21. Select Environments. Click Create next to the plus sign.
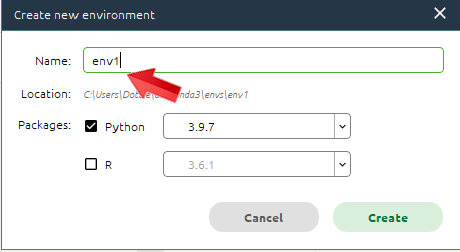
22. Type in the environment name, env1.
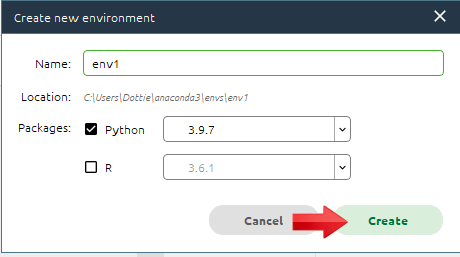
23. Click Create.
24. Select env1.
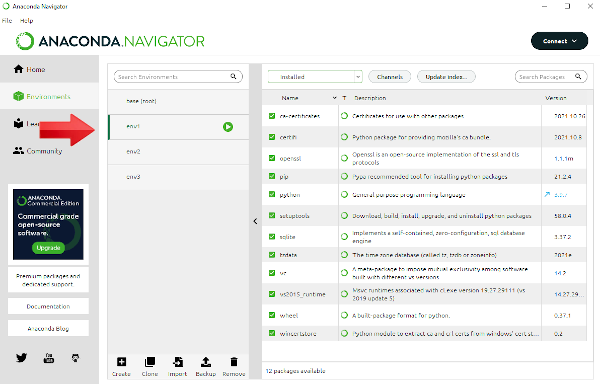
25. In the box near the top of the page where it says Installed, select Not Installed.
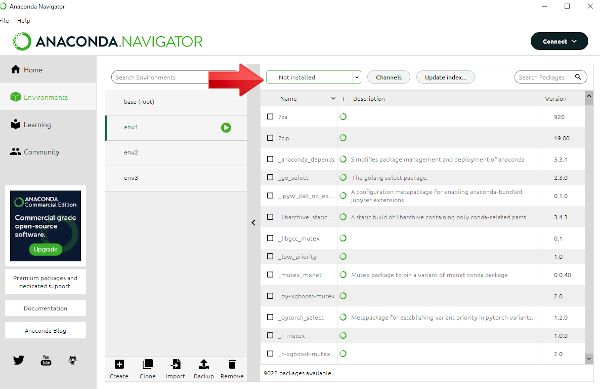
26. Type tensorflow in the Search box and Update Index.
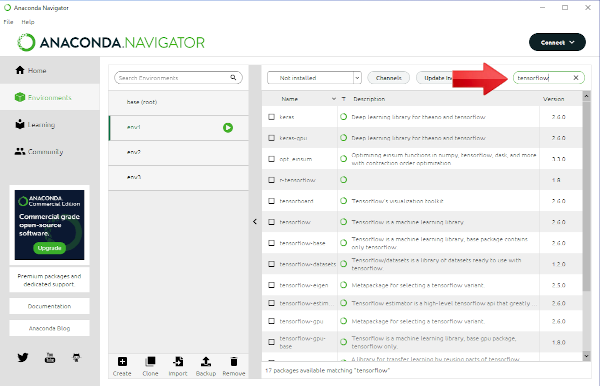
27. Check the box for tensorflow and click Apply.
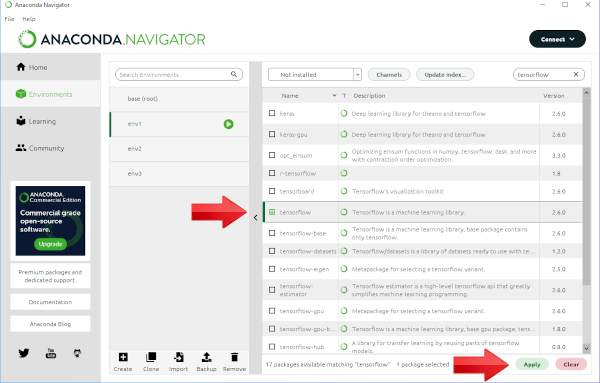
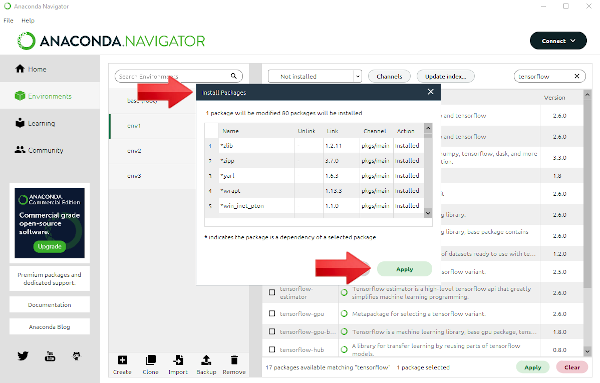
28. In Install Packages click Apply. This will take some time.
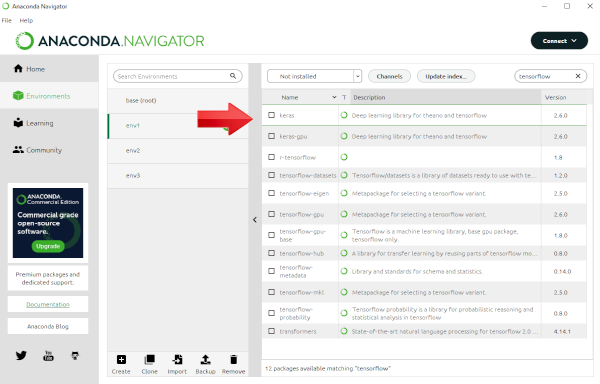
29. In the list of 12 packages, check Keras.
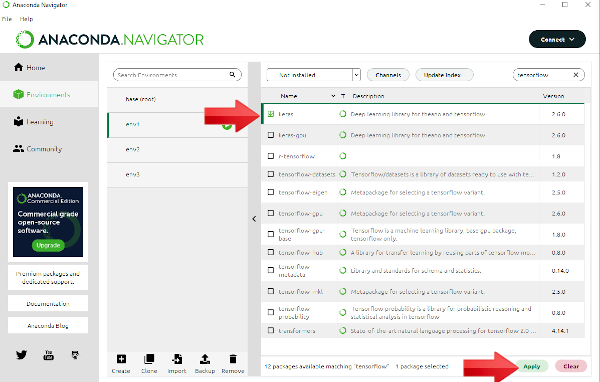
30. Be sure Keras is selected, and click Apply.
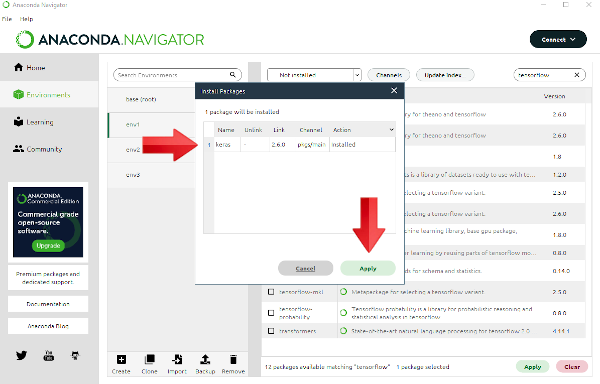
31. Under Install Packages Keras, click Apply. This will take some time.
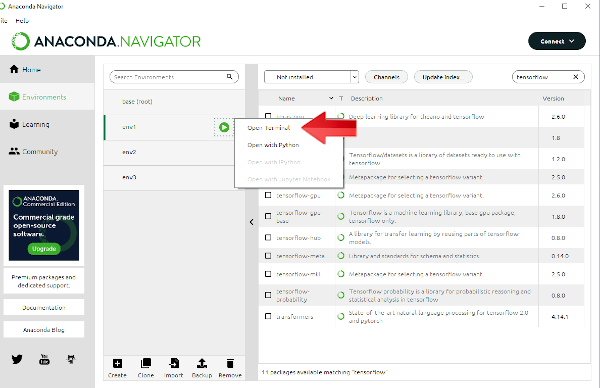
32. In env1 click on the green dot. Select Open Terminal. Note: At the time of this installation the command line does not open. I am sure this bug will be remedied in the future. Proceed to Part III, and install Jupyter. Jupyter does work.
SALARSEN.COM
Python Tutorial
Anaconda Linux Install I
Navigator Install II
Jupyter Install III
Program Details
